Home automation has revolutionized the way we interact with our living spaces, providing convenience, energy efficiency, and enhanced security.
In this article, we will explore how to create a Home Automation using NodeMCU ESP8266 and a PHP website. This combination allows you to control and monitor various devices and appliances remotely, providing a seamless and interconnected smart home experience.
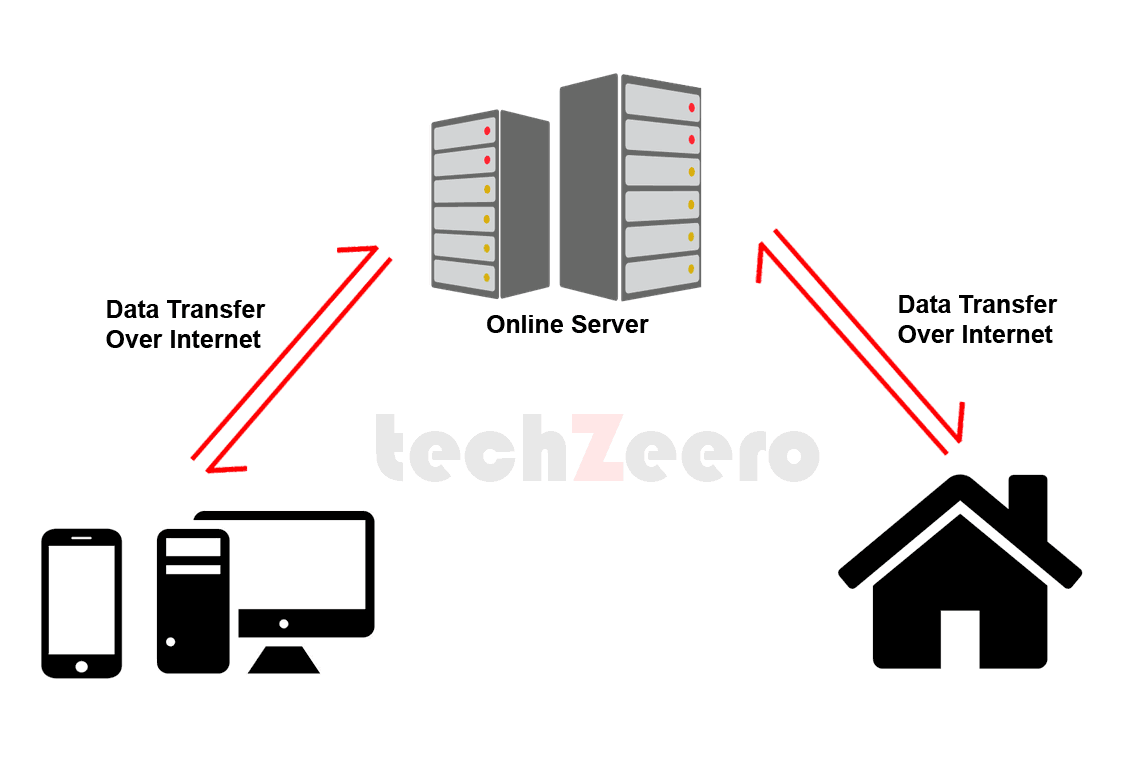
We also develop a PHP website to command the NodeMCU for controlling our home appliances. We use a hosting server to online our website for controlling our home appliances from everywhere.
Understanding NodeMCU ESP8266
- Introduction: NodeMCU ESP8266 is an open-source development board with built-in Wi-Fi capabilities, perfect for IoT projects.
- Features and Specifications: The key features of NodeMCU ESP8266, including its microcontroller, Wi-Fi connectivity, GPIO pins, and programmability.
Explore More Tutorials
- Explore NodeMCU ESP8266 .
- Relay Module.
- Get Started With NodeMCU.
- Relay Module with Arduino.
- Home Automation Using Arduino and Bluetooth.
Components Needed
How it works
Setup the Website
First, we have to make a website and host it from an online server. We have developed a basic PHP website with an MYSQL database.
You have to perform following steps:
- Download the following PHP codes files which is in zip format.
- Now go to your PHPMyAdmin in your CPanel and create a database. Here we named our database as “autodb“.
- Now upload the PHP Scripting file to public_html in your CPanel’s File Manager.
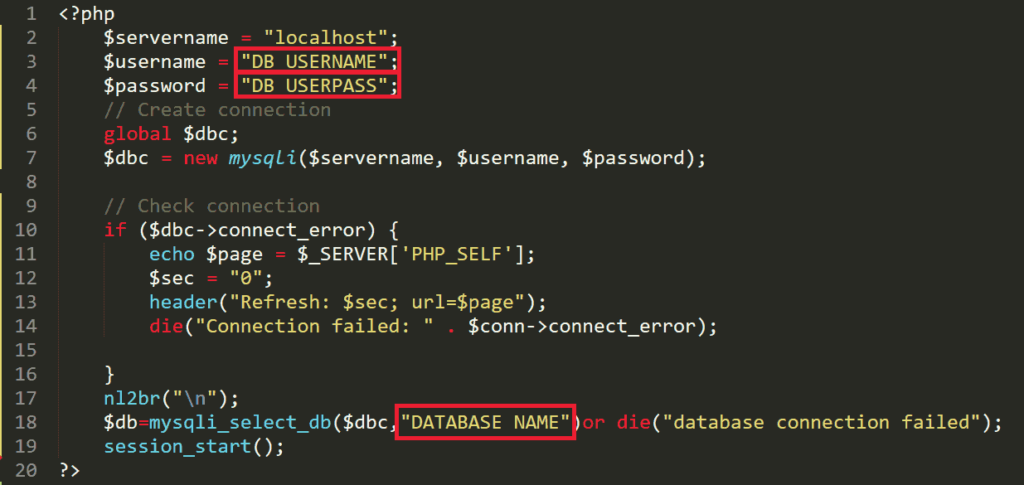
- Extract the zip file and edit the connection.php file.
- Now change the “DB USERNAME“, “DB USERPASS”, and “DATABASE NAME” in the connection.php file.
- Now download the above SQL database file. Extract the Zip File.
- Import the SQL file to the “autodb” database in your PHPMyAdmin.
- Now browse the desired file location on the website in the web browser. For example – www.domain.com/automation. Here automation is the folder where we have saved our PHP files.
- The login credentials are Email: [email protected] and Password: 12345.
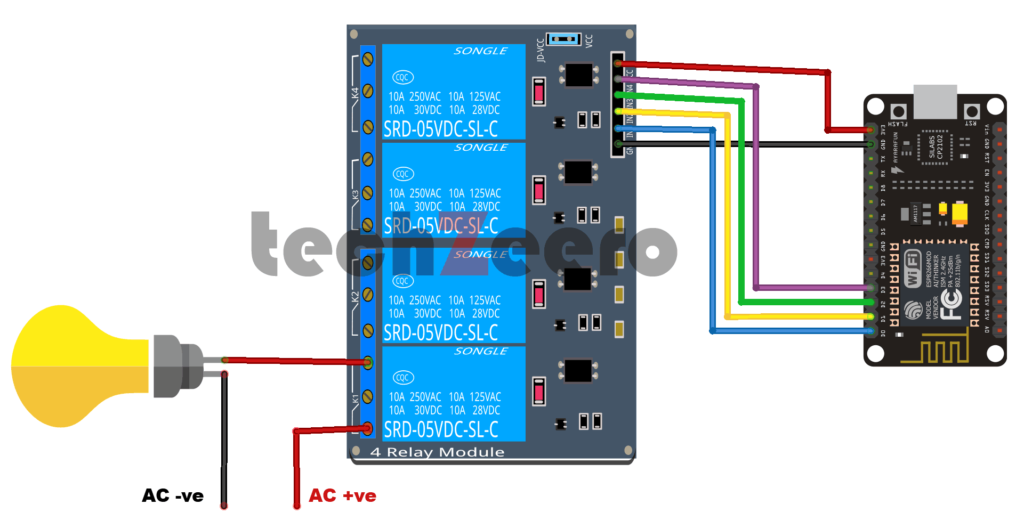
Circuit Diagram of NodeMCU with Relay Module
Code For NodeMCU
Now open the Arduino IDE and change the Board from tools.
Must See: How to program NodeMCU with Arduino IDE.
Now copy the below code and paste it in Arduino IDE. Change the WiFi SSID, Password, and Domain Name from “www.domain.com” in the below code.