Introduction to Random Numbers and Arduino
Imagine a world where randomness rules – where unpredictability sparks creativity and fuels innovation. In the realm of Arduino, the art of generating random numbers opens up a whole new dimension of possibilities. From creating unique light patterns to designing interactive games, mastering the magic of random numbers can take your projects to exciting new heights.
In this tutorial, we will learn how to generate random numbers by using Arduino.
You may see many times a captcha verification of a random number and also some games.
We generate random no’s that have a range from zero up to a specified maximum number or between a minimum and maximum value you provide.
Generating Pseudo-Random Numbers with the random() Function
Are you ready to dive into the world of generating pseudo-random numbers with Arduino? Let’s explore how the random() function can add a touch of unpredictability to your projects. This built-in function allows you to generate random values within a specific range, making it perfect for simulating randomness in your code.
By using the random() function, you can create sequences of numbers that appear random but are actually deterministic. This means that each time you run your program, you’ll get a new set of pseudo-random numbers based on a starting point called a seed value.
One thing to keep in mind is that these pseudo-random numbers are not truly random since they follow a predictable pattern. However, for many applications where true randomness isn’t necessary, such as simulations or games, pseudo-random numbers generated by the random() function work just fine.
Experimenting with different seed values can help introduce variation into your generated numbers and add an element of unpredictability to your projects. So go ahead and start playing around with the random() function in Arduino – who knows what exciting results you might discover!
The random function is used to return a random number. Calling random() with a single parameter sets the upper bound. And these values will range from zero to one less than the upper bound:
random(max); //return a random number between 0 to max-1Calling random() with two parameters sets the lower and upper bounds. This values will range from the lower bound to one less than upper bound:
random(min, max); //return a random number between min and max-1Code for random numbers
Here is an example that uses the different forms of random number generation available on Arduino. Upload the below code on Arduino.
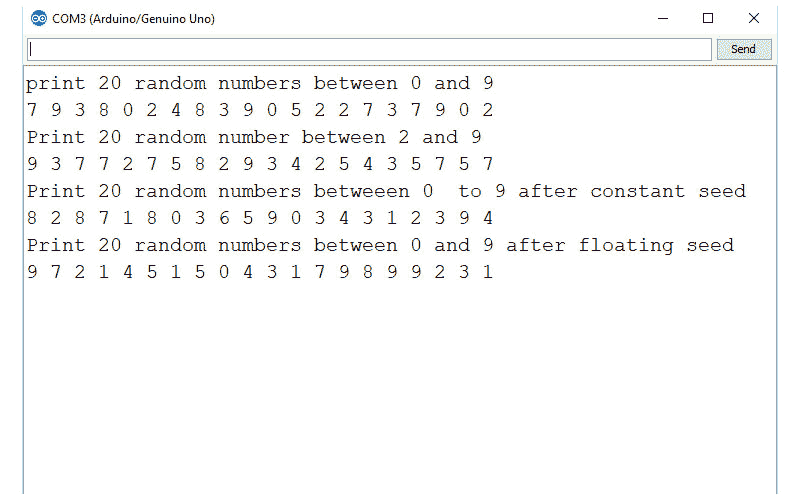
Output

If you press the reset button on Arduino to restart the sketch, the first lines of random no’s will be unchanged.
Only the last line changes each time the sketch starts because it sets the seed to a different value by reading it from an unconnected analog input port as a seed to the randomSeed function.
If you are using analog port 0 for something else, change the argument to analogRead to an unused analog port.
Tips and Tricks for Efficiently Generating Random Numbers
When working with random no’s in Arduino, there are a few tips and tricks that can help you generate them efficiently. One useful tip is to avoid using delays in your code as they can affect the randomness of the generated numbers. Instead, consider using millis() function for timing.
Another trick is to use seed values from external sources like analog pins or sensors to increase randomness. This can be particularly helpful if you need truly random numbers for security or encryption purposes.
Additionally, try experimenting with different algorithms for generating random numbers to find one that suits your project’s needs best. It’s also essential to test and validate the randomness of the generated numbers before integrating them into your final code.
Remember to keep your code clean and organized by breaking down complex tasks into smaller functions. This will not only make it easier to debug but also improve the efficiency of generating random no’s in your Arduino projects.