Introduction to Serial Communication
Serial communication in Arduino offers a convenient way to establish communication between the microcontroller and external devices. By utilizing serial communication, Arduino can send and receive data in real-time, making it ideal for various projects that require interaction with sensors, displays, or other hardware components.
One of the key reasons to use serial communication in Arduino is its versatility. It allows for bidirectional data transfer, enabling seamless integration of different modules within a project. Whether you need to collect sensor readings, control actuators, or display information on a screen, serial communication provides a reliable means to achieve these functionalities.
Moreover, serial communication is efficient and lightweight compared to other forms of data transmission. It enables precise control over data flow and ensures that information is transmitted accurately without delays or errors. This makes it an essential tool for building responsive and interactive Arduino projects that rely on timely exchange of information between devices.
How Does Serial Communication Work?
Serial communication in Arduino works by establishing a connection between two devices using digital data transmission through a serial port. It involves sending bits of data one after another in a specific order. This allows for the transfer of information between the Arduino board and other devices like computers, sensors, or displays.
The process begins with setting up parameters such as baud rate, parity, and stop bits to ensure both devices communicate effectively. When data is sent from the Arduino, it gets converted into a stream of digital signals that can be interpreted by the receiving device. Similarly, data received by the Arduino is processed and utilized based on predefined instructions in the code.
Understanding how serial communication works is crucial for enabling seamless interaction between different components in your Arduino projects. By mastering this fundamental concept, you can unlock endless possibilities for creating innovative applications and projects utilizing your Arduino board’s capabilities.
Setting up Serial Communication in Arduino
Setting up serial communication in Arduino is essential for connecting your Arduino board to other devices, such as a computer. To begin, you need to establish a connection between the Arduino board and your computer using a USB cable. Next, open the Arduino IDE software on your computer.
Within the Arduino IDE, navigate to the Tools menu and select the appropriate port that corresponds to your connected Arduino board. This step ensures that data can be transmitted back and forth between the two devices seamlessly. Once you have selected the correct port, you are ready to start coding.
In your sketch, use functions like Serial.begin() to initialize serial communication at a specific baud rate. This function sets up communication parameters that both devices must adhere to for successful data transfer. Remember, consistency is key when configuring serial communication settings!
Serial.begin(9600);The 9600 in the above function is a baud rate and you can change it according your need.
Sending Data to Serial Monitor
When working with Arduino, sending data to the serial monitor is a crucial part of debugging and monitoring your projects. It allows you to view real-time information from your device.
To send data to the serial monitor, use the `Serial.begin()` function in your setup code to initialize communication at a specific baud rate. Then, you can use `Serial.print()` or `Serial.println()` functions to send data as text.
You can also format the output by combining text and variables using concatenation or formatting options like `Serial.print(“Sensor Value: “); Serial.println(sensorValue);`.
By opening the serial monitor on your computer and selecting the correct baud rate that matches your Arduino code, you will start receiving the data being transmitted from your device.
Experiment with different types of data such as sensor readings or status messages to better understand how your project is performing in real time.
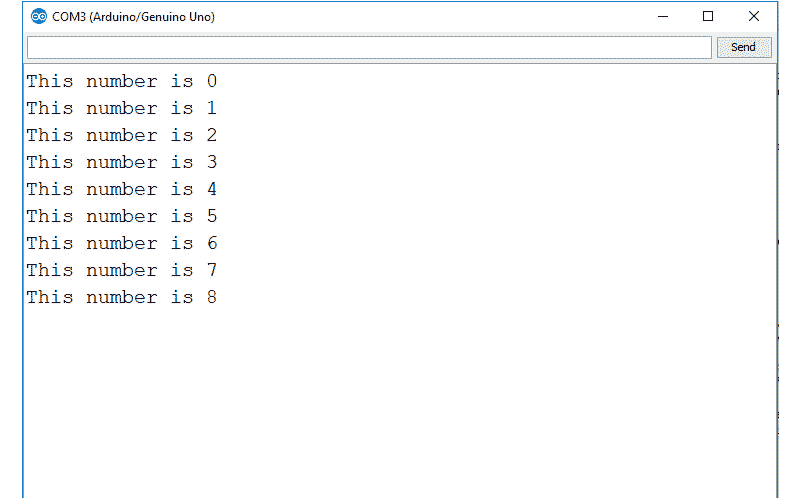
The below sketch prints sequential numbers on the Serial Monitor. Upload the code and open the serial monitor for viewing the output.
Output
Sending Formatted Data from Arduino to Serial Monitor
When working with Arduino, sending formatted data to the Serial Monitor can provide valuable insights into your project. By formatting data before transmission, you can make it easier to read and interpret.
To send formatted data from Arduino to the Serial Monitor, you can use functions like ‘Serial.print()’ or ‘Serial.println()’. These functions allow you to specify the format of the data being sent, whether it’s text or numerical values.
For example, if you want to display sensor readings in a clear way, you can use formatting options like specifying decimal places for floating-point numbers or adding text labels for better context.
By utilizing formatted data output in your Arduino projects, you can enhance readability and simplify debugging processes. It’s a useful technique that adds clarity to your serial communication workflow.
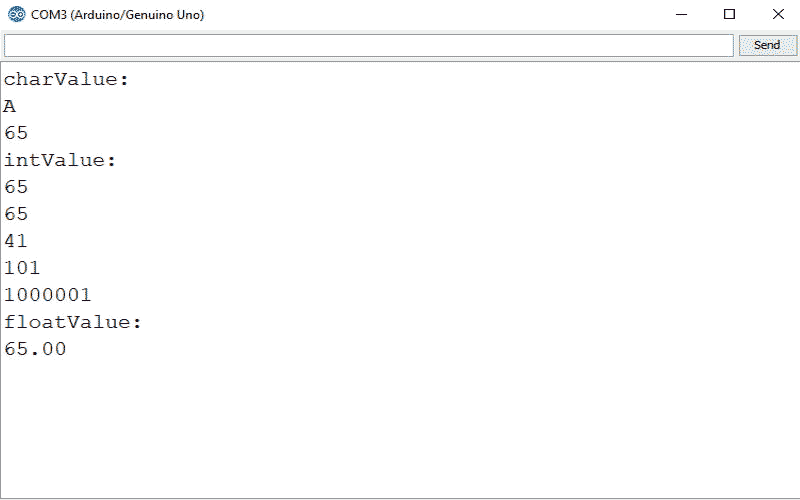
The data to the serial port can be printed in many formats. By the below sketch we print different values in HEX, DEC and other forms.
Output
Receiving Data Using Serial Monitor to Arduino
Receiving data using the Serial Monitor in Arduino is a crucial aspect of serial communication. It allows you to gather information sent from your Arduino board and analyze it in real-time. To receive data successfully, ensure that your baud rate settings on both the Arduino code and Serial Monitor match.
When receiving data, be mindful of the format in which it is being transmitted. Whether it’s text, numbers, or sensor readings, understanding the structure will help you interpret and utilize the incoming information effectively.
Utilizing functions like `Serial.available()` and `Serial.read()` can assist in capturing incoming data efficiently. Remember to handle received data appropriately based on your project requirements – whether it’s displaying values, triggering actions, or storing information for later use.
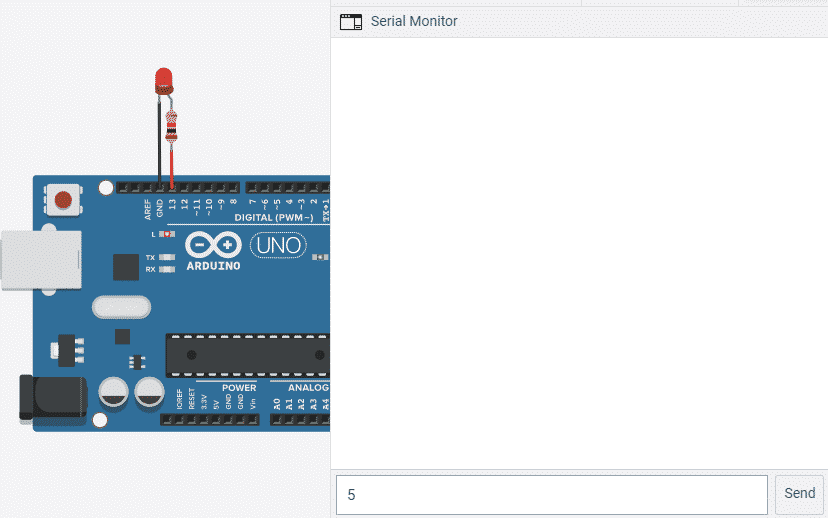
It’s easy to receive 8-bit values (chars and bytes) because the Serial function uses 8-bit values. The below sketch receives a digit (single character 0 through 9) and blinks the LED on pin 13 at a rate proportional to the received digit value.
Upload the above sketch and send a message using the serial Monitor. Open the serial monitor and type a digit in the text box at the top of the serial monitor window. Clicking the send button will send the character typed into the text box, you should see the blink rate change.
Practical Applications of Serial Communication in Arduino
Serial communication in Arduino opens up a world of practical applications beyond just blinking LEDs. One common use is creating data logging systems where sensor readings are transmitted to a computer for analysis. This can be especially handy in environmental monitoring or IoT projects.
Another application is controlling external devices like motors or actuators based on input received through serial communication. Imagine automating your home’s blinds with just a few lines of code and an Arduino board!
Additionally, serial communication allows for remote debugging and troubleshooting by enabling real-time monitoring of variables and outputs from the Arduino board. This feature comes in handy when dealing with complex projects that require constant monitoring and adjustment.
Moreover, using serial communication, you can create interactive interfaces between your Arduino project and software running on a computer. This enables users to control various parameters of the project directly from their PC, opening up endless possibilities for creative projects and experiments.
In essence, mastering serial communication in Arduino not only enhances the functionality of your projects but also paves the way for innovative solutions across different fields such as automation, robotics, data logging, and more.
Troubleshooting Common Issues with Serial Communication
Serial communication in Arduino can sometimes encounter issues that might seem daunting at first, but with some troubleshooting, they can be easily resolved. One common problem is incorrect baud rate settings between the Arduino and the serial monitor. Ensure that both are set to the same baud rate for successful communication.
Another issue could be improper wiring or loose connections. Double-check your connections to make sure everything is securely connected. Additionally, using long or poor-quality USB cables can lead to data transmission errors, so opt for a shorter high-quality cable.
If you’re still facing problems, try resetting both your Arduino board and the serial monitor software. Sometimes a simple reset can solve unexpected glitches. Make sure you have selected the correct COM port in your IDE for proper communication.
By addressing these common issues systematically, you’ll be able to troubleshoot any serial communication hiccups effectively and get back to working on your projects seamlessly.
Here some more tutorials for you: