Introduction to LDR Sensor and Arduino
In this blog post, we will dive into the exciting realm of LDR sensor paired with Arduino microcontrollers. Get ready to explore how light-dependent resistors (LDRs) work in harmony with Arduino to create innovative solutions for various applications. Let’s illuminate our understanding of LDR sensor with Arduino projects together!
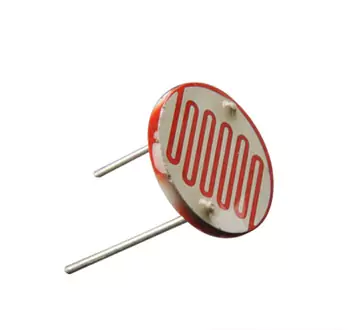
An LDR sensor (Light Dependent Resistor) is a device that is used to detect light. It detects the light intensity. We use it to control the lights, when there is dark it detects light intensity and blows the lights. As it mainly used in mobiles for auto-brightness and smart street lights.
How the LDR Sensor Works
The LDR sensor, or Light Dependent Resistor, operates on the principle of changing resistance based on light intensity. When exposed to light, the LDR’s resistance decreases, allowing more current to flow through it. Conversely, in darkness, the resistance increases, restricting current flow.
This change in resistance is detected by the Arduino board connected to the LDR sensor. The Arduino then processes this information and can trigger different actions based on programmed instructions.
By utilizing this functionality, you can create projects that respond to changes in ambient light levels. For instance, you could design a system that automatically turns lights on when it gets dark or a plant watering system that activates when sunlight fades.
Components Needed
- Arduino Board
- LDR Sensor
- Jumper Wires
- 1 x Breadboard
- 1 x LED
Circuit Diagram of LDR Sensor with Arduino
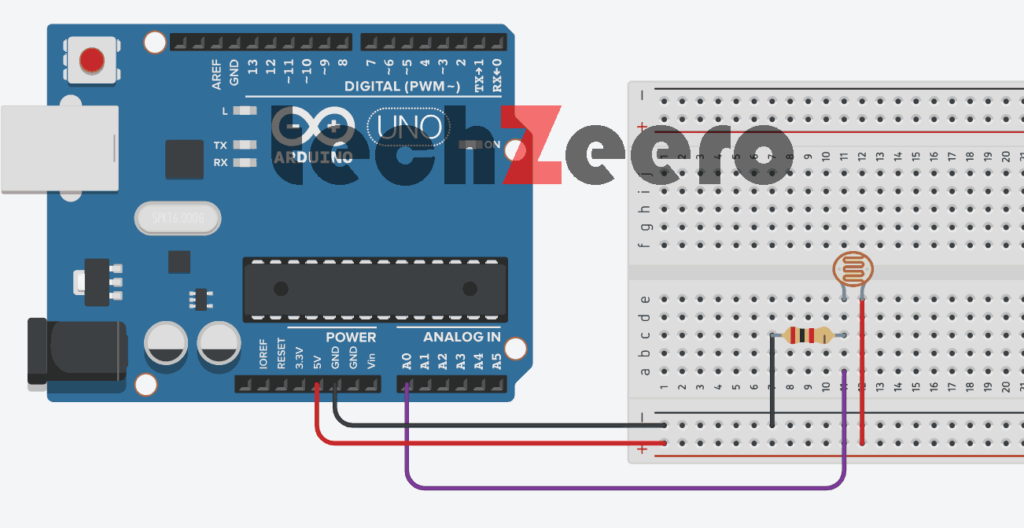
The circuit diagram of the LDR sensor with Arduino is quite simple and straightforward, making it an excellent project for beginners in electronics. With just a few components, you can create a light sensing system that interacts with the Arduino board seamlessly.
To set up the circuit, connect one leg of the LDR (Light Dependent Resistor) to the 5V pin on the Arduino board and connect its other leg to analog pin A0. It’s essential to add a resistor in series with the LDR to form a voltage divider circuit accurately.
By reading the analog input from pin A0, Arduino can measure changes in light intensity detected by the LDR. This information allows you to implement various applications like automatic lighting systems or sunlight tracking devices easily.
Code for Testing LDR Output
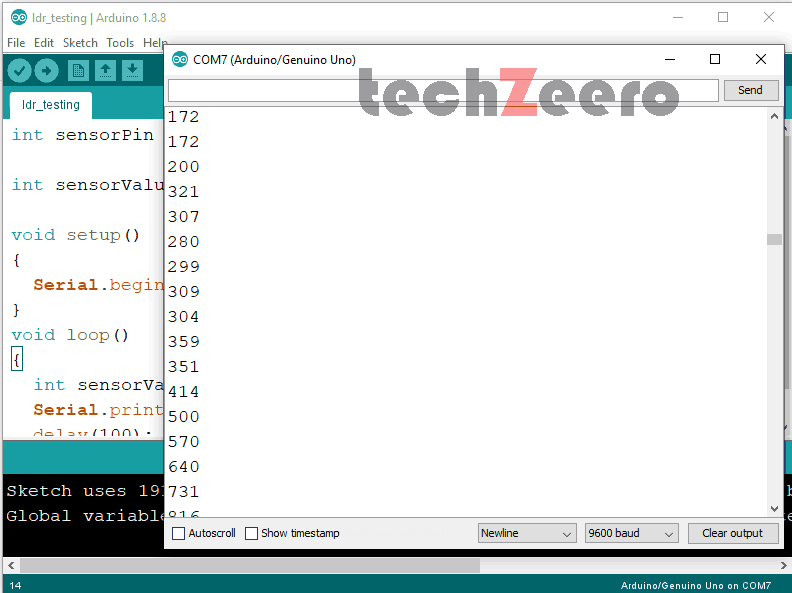
First, we will test the LDR that it is working or not. For this, we will display the LDR output readings on the Serial Monitor.
Write a simple code using the Arduino IDE that reads analog values from the LDR sensor connected to the analog pin on the Arduino board. By converting these light intensity values into digital data, you can effectively monitor changes in brightness detected by the sensor.
Through serial communication, you can then view these readings on your computer screen in real-time. This allows you to observe how variations in light affect the output of the LDR sensor and validate its performance under different lighting conditions.
Output Of LDR Testing
Circuit Diagram of LDR Sensor and LED with Arduino
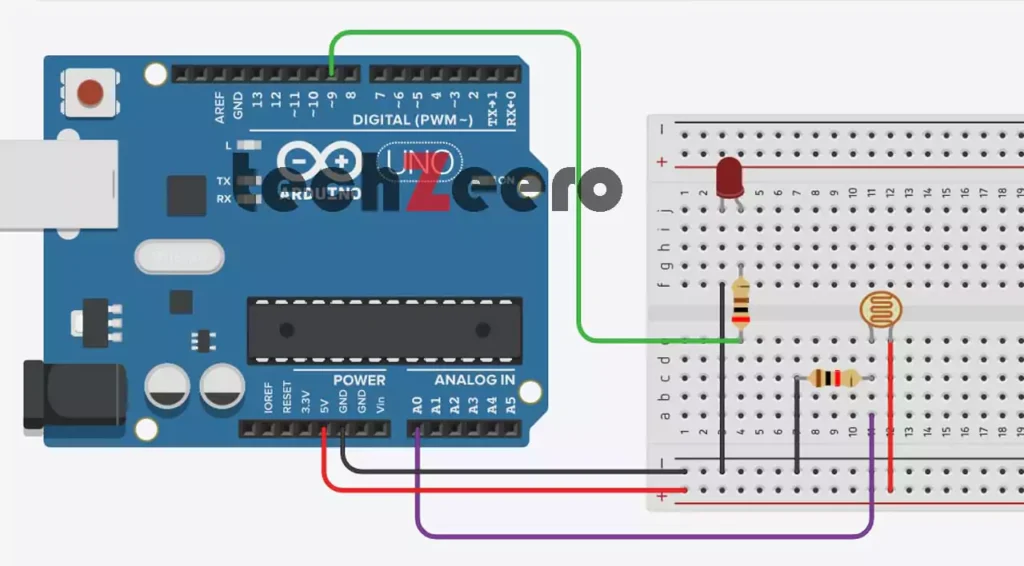
In the circuit, connect one leg of the LDR sensor to the 5V pin on Arduino and the other leg to analog pin A0. Then link one end of a resistor to A0 as well and connect its other end to ground. Next, attach the cathode of an LED through another resistor to ground and its anode to digital pin 13 on Arduino.
When you upload your code and expose the LDR sensor to varying light levels, observe how the LED brightness adjusts accordingly. This interactive setup showcases how technology can respond dynamically to environmental stimuli – a fantastic learning experience!
Code for LDR Sensor and LED with Arduino
After connecting the LDR sensor and LED to your Arduino board according to the circuit diagram. In the code, you’ll need to read analog input from the LDR using one of Arduino’s analog pins. Based on this input, you can then adjust the brightness or turn on/off the LED accordingly.
By tweaking your code, you can experiment with different thresholds for light levels triggering the LED. This allows for customization depending on your specific project requirements.
Once uploaded to your Arduino board, observe how changes in ambient light impact when and how brightly the LED illuminates. It’s a fascinating way to merge technology with real-world phenomena seamlessly.
Output
After setting up the LDR sensor with Arduino and writing the code, it’s time to see the output in action. The LDR sensor detects light intensity and converts it into electrical signals which can be read by Arduino. Once you run the code, you will observe how the sensor responds to changes in light around it.
Applications of the LDR Sensor in Daily Life
Have you ever wondered how light-dependent resistors, or LDR sensors, play a role in our daily lives?
- These small yet mighty sensors are commonly used in automatic outdoor lighting systems. When natural light decreases at dusk, the LDR sensor detects this change and triggers the lights to turn on.
- LDR sensors are also utilized in streetlights to regulate their brightness levels based on ambient light conditions. This not only helps save energy but also enhances safety by ensuring proper visibility on the roads during different times of the day.
- In home automation systems, LDR sensors can be incorporated to control indoor lighting and adjust it according to the amount of natural light entering a room. This automation not only adds convenience but also contributes towards energy efficiency by reducing unnecessary use of artificial lighting.
- Moreover, LDR sensors find applications in security systems where they detect unauthorized entry by sensing sudden changes in ambient light levels. By triggering alarms or activating cameras, these sensors help enhance security measures in homes and commercial spaces alike.
Troubleshooting Common Issues
Encountering issues while working with LDR sensors and Arduino is a common part of the learning process.
- One common problem that users face is inaccurate readings from the sensor. This can often be due to improper connections or a faulty sensor.
- If you notice that the sensor is not responding at all, double-check your circuit connections to ensure everything is properly wired. Sometimes a loose connection can cause the sensor to malfunction.
- Another issue could be related to the ambient light conditions in which you’re testing the sensor. Make sure there isn’t too much light falling directly on the LDR as it may affect its readings.
- If you’re still facing problems, consider checking your code for any errors or bugs that might be impacting the functionality of the sensor.