In this blog, we will display the custom characters on an LCD 16×2. Liquid crystal display (LCDs) offer a convenient and inexpensive way to provide a user interface for a project.
By far the most popular LCD used is the text panel based on the Hitachi HD44780 chip. This displays two or four lines of text, with 16 or 20 characters per line (32 and 40 character versions are also available, but usually at much higher prices).
We want to define and display custom characters or symbols (glyphs) that we have created. The symbols we want to display are not predefined in the LCD character memory.
A library for driving text LCD displays is provided with Arduino, and you can print text on your LCD easily as on the serial monitor because of LCD and serial share the same underlying print function.
Components Needed
- Arduino.
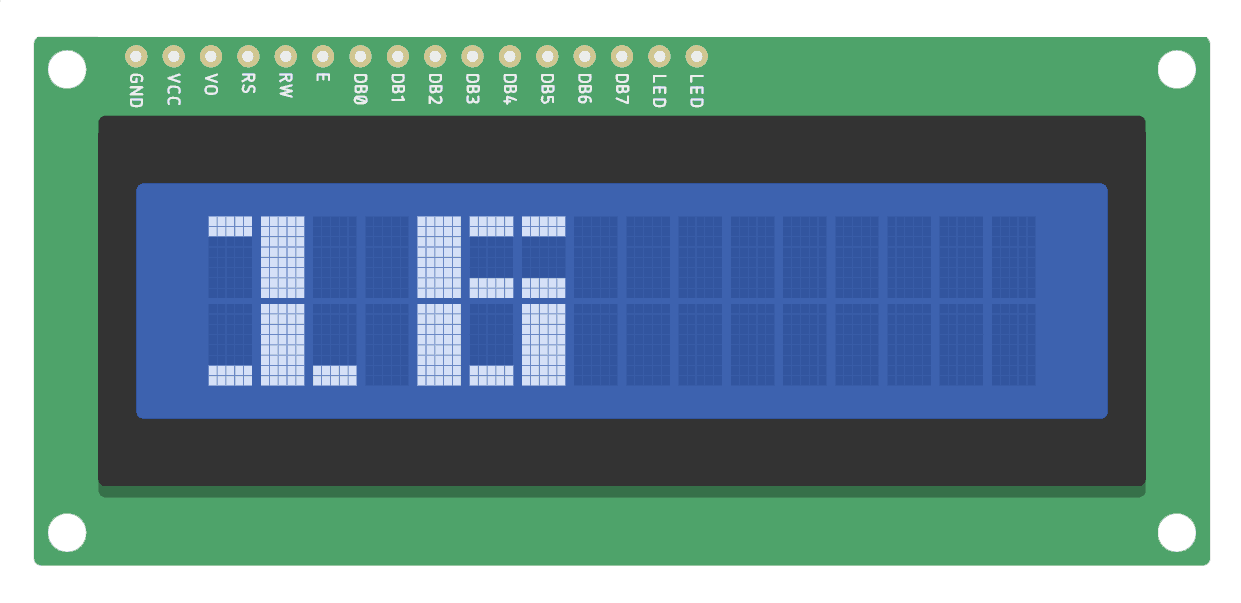
- LCD Display 16×2.
- Potentiometer.
- Resistors.
- Jumper Wire.
- Breadboard.
About LCD 16×2 Dot Matrix
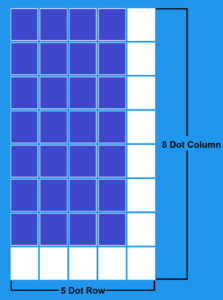
To display custom characters on LCD, we must first know about the LCD dot matrix means pixels in LCD. There are 5 pixels in rows and 8 pixels in columns means every character is a combination of 5*8 dots.
The LiquidCrystal library enables you to create up to eight custom characters, which can be printed as character codes 0 through 8. Each character on the screen is drawn on a grid of 5 x 8 pixels.
To define a character, you need to create an array of eight bytes. Each byte defines one of the rows in the character. When written as a binary number, the 1 indicates a pixel is on, 0 is off (any values after the fifth bit are ignored).
Custom Characters Pattern Code
|
S.NO: |
Custom Character |
Pattern Code |
|
1 |
|
0b00000, 0b01010, 0b11111, 0b11111, 0b11111, 0b01110, 0b00100, 0b00000 |
|
2 |
|
0b00000, 0b01010, 0b00000, 0b00000, 0b10001, 0b01110, 0b00000, 0b00000 |
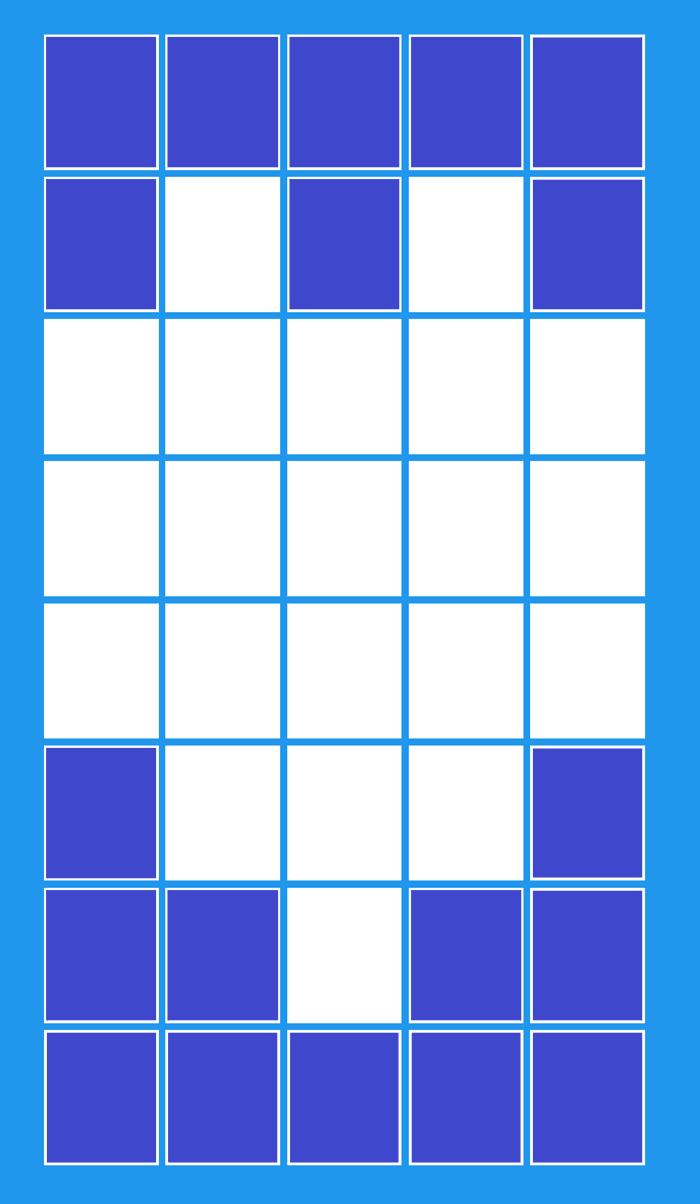
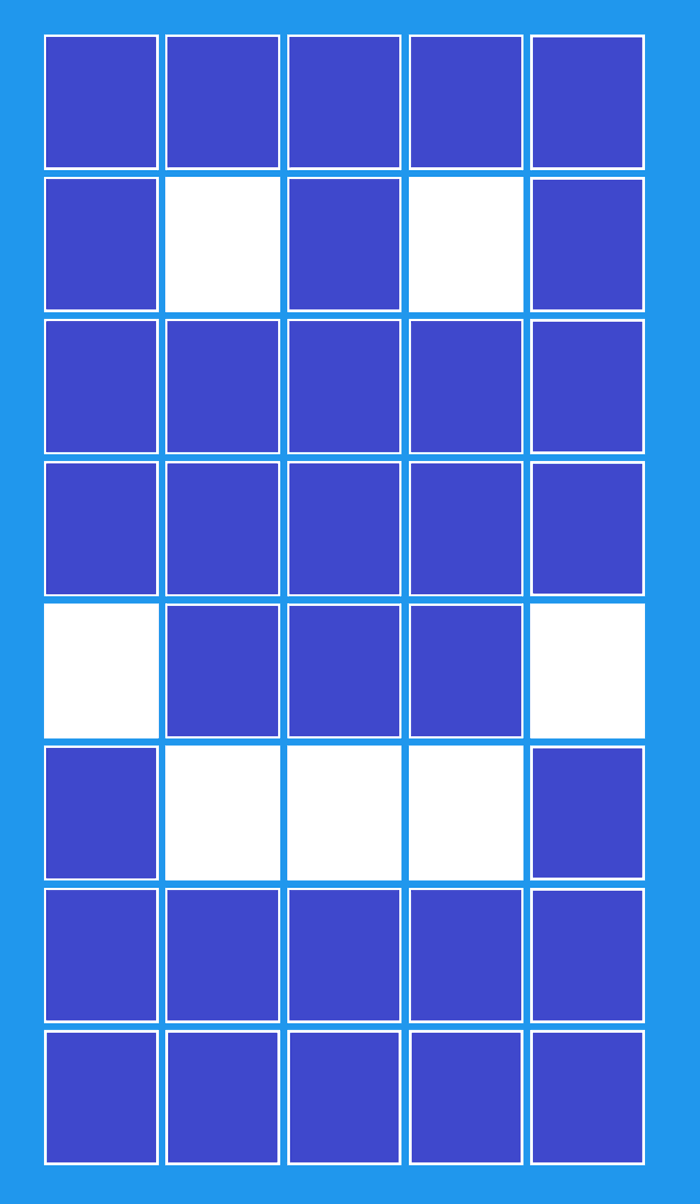
Simply put “0” on the un-shaded place and “1” on the shaded place for each byte.
You also can generate the pattern code using the Custom Code Generator.
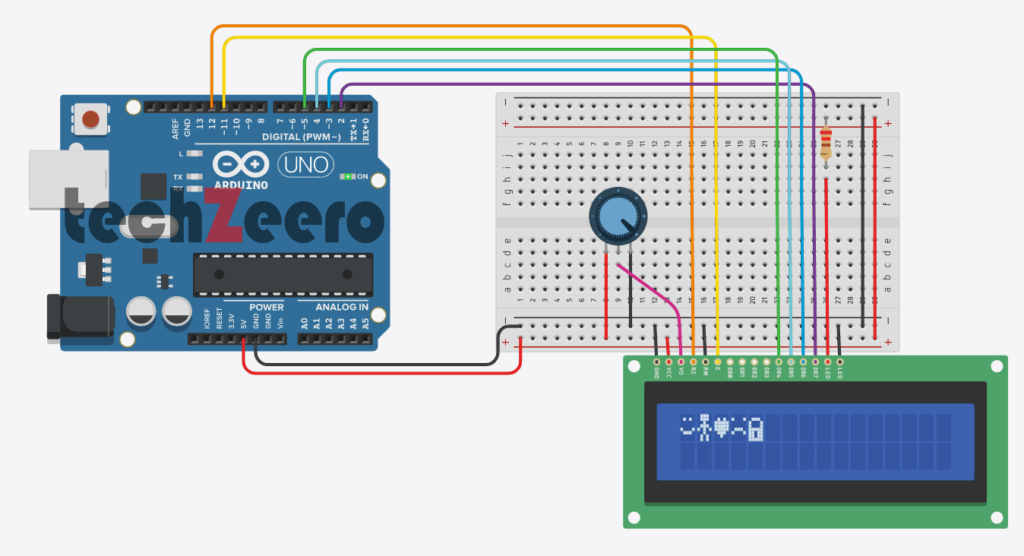
Circuit Diagram for Custom Characters on LCD
To create custom characters, you will need to connect the Arduino board to the 16×2 LCD display using jumper wires. By following the correct pin configurations and connecting each component accordingly, you can start programming your own characters.
Typically, the circuit involves linking data pins from Arduino to corresponding pins on the LCD screen while also connecting power and ground pins for proper functioning.
Reference:- Interfacing an LCD 16×2 with Arduino.
Code for Custom Characters
Creating custom characters for your 16×2 LCD using Arduino opens up a world of possibilities for personalization. By defining your own character patterns in the code, you can display unique symbols, icons, or even alphanumeric characters beyond the standard set.
In order to define custom characters, you will first need to determine the binary values that represent each pixel in an 5×8 matrix. These values are then entered into the Arduino code using special commands provided by the LiquidCrystal library.
Once you have defined your custom characters in the code, you can easily call them to be displayed on your LCD screen with a single line of code.
The following code creates customs characters on the LCD.
Displaying Large Font / Double Height Characters
Have you ever wanted to make your text stand out on a 16×2 LCD display using Arduino? Well, displaying large font or double height characters can help you achieve just that!
To implement large font or double height characters on an LCD screen, you’ll need to modify the standard font size by adjusting the pixel dimensions of each character. This allows for increased readability and visibility of important information.
Code for Double Height Characters
To create double height characters, you will need to allocate additional space in your code to define these special symbols. By specifying the pixel patterns for each segment of the character, you can instruct the LCD to render them in double size effectively.
Make sure that your code includes instructions for both rows of pixels when designing double height characters. This way, you ensure that each character appears clearly and consistently across the display without any distortion or overlapping issues.
The LCD display has fixed-size characters, but you can create larger symbols by combining characters. This recipe creates five custom characters.
The glyphs array defines pixels for the five custom characters. The array has two dimensions given in the square brackets:
byte glyphs[5][8] ={...[5] is the number of glyphs [8] is the number of rows in each glyph. Each element contains 1s and 0s indicate whether a pixel is on or off in that row. If you compare the values in glyph[0] (the first glyph), you can see that the 1s correspond to dark pixels:
{B11111,B11111,B00000,B00000,B00000,B00000,B00000,B00000},Each big number is built from six of these glyphs, three forming the upper half of the big digit and three forming the lower half. BiDigitsTop and bigDigitsBot are arrays defining which custom glyph is used for the top and bottom rows on the LCD screen.
Troubleshooting Common Issues
Encountering issues while displaying custom characters on your 16×2 LCD using Arduino can be frustrating but fear not, troubleshooting common problems is part of the journey to mastering this fun project!
- One common issue you might face is incorrect wiring. Double-check your connections to ensure everything is properly connected according to the circuit diagram.
- If your custom characters are not displaying correctly, it could be a programming error. Review your code carefully to identify any mistakes or typos that may be causing the problem.
- Another potential issue could be with the contrast settings on the LCD. Adjusting the contrast potentiometer might help improve visibility and clarity of your custom characters.
- In some cases, a faulty component such as a damaged LCD screen or a defective Arduino board could also be the culprit. Consider testing each component individually to pinpoint where the issue lies.
Creative Ideas for Using Custom Characters on LCD Display
Looking to add a touch of creativity to your LCD display project? Custom characters offer endless possibilities for enhancing your designs.
- How about using custom characters to create unique icons or symbols that represent specific data points or functions on your screen? By designing custom graphics, you can make your LCD display more visually appealing and user-friendly.
- Another idea is to utilize custom characters for gamification purposes. You could design special characters that level up or change based on certain conditions, adding an interactive element to your display.
- Custom characters can also be used for storytelling. Imagine creating a series of custom glyphs that unfold a narrative as the user interacts with the display, providing both information and entertainment.
- Additionally, consider employing custom characters in educational settings. Designing special fonts or symbols tailored to specific subjects can help students engage with the content in a fun and memorable way.