Introduction to Sound Sensors and Arduino
Welcome to the fascinating world of sound sensor and Arduino! If you’ve ever wanted to explore how sound can be transformed into data and used for creative projects, this blog post is just what you need.
Sound sensors paired with Arduino open up a realm of possibilities for both beginners and seasoned makers alike. Get ready to dive into the exciting intersection of technology and audio as we guide you through setting up your own sound sensor project with Arduino. Let’s make some noise – in the best possible way!
In this blog, we will how to detect sound like clapping, talking or shouting with the help of a sound sensor with Arduino.
By detection of sound, we can control home appliances like lights, fans, tv, etc.
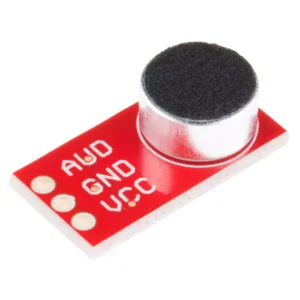
We will use the BOB-08669 breakout board for the Electret Microphone. BOB-08669 is a SparkFun product. It is a microphone that uses a dc voltage of 2.7V up to 5.5V.
Components Needed
- Arduino.
- Sound Sensor BOB-08669.
- LED.
- Jumper Wires.
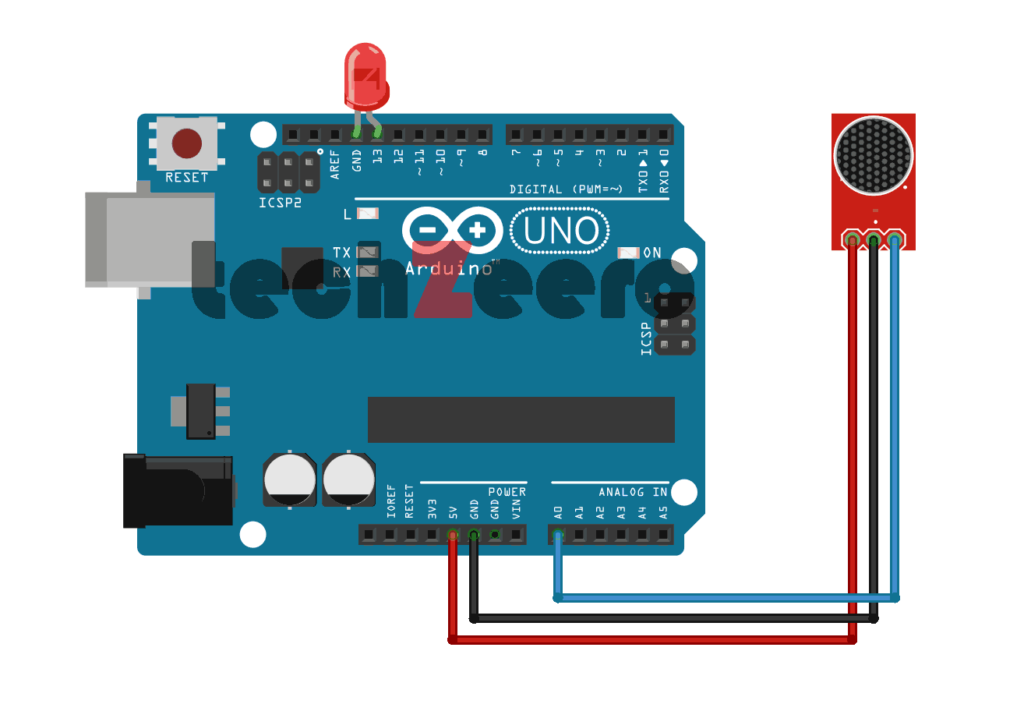
Circuit Diagram for Sound Sensor with Arduino
You will need to connect the signal pin of the sound sensor to one of the analog pins on the Arduino board. This allows for communication between the two components.
Next, make sure to connect the VCC pin of the sound sensor to 5V on the Arduino board and ground pin to GND. These connections provide power supply for your sound sensor.
Additionally, including a resistor in your circuit can help protect both your sound sensor and Arduino from potential damage due to voltage fluctuations or spikes.
Code for Sound Sensor with Arduino
In programming for a sound sensor project, you can start by defining variables to store incoming data from the sensor. Then, set up your pins and establish communication between the Arduino board and the sensor.
Next, utilize conditional statements to trigger specific actions based on different sound levels detected by the sensor. This allows for customizing responses according to varying noise levels in your environment.
The built-in LED on Arduino pin 13 will turn on when you clap, shout, or play loud music near the microphone.
Here we need to adjust the threshold, use the Serial Monitor to view the high and low values, and change the threshold value so that it is between the high values you get when noise is present and the low values when there is little or no noise.
A microphone produces very small electrical signals.
If we connected it straight to the pin of an Arduino, you would not get any detectable change. The signal needs to be amplified first to make it usable by Arduino.
Troubleshooting Common Issues
Having trouble with your sound sensor project? Don’t worry, troubleshooting common issues is all part of the learning process.
- First things first, double-check all your connections. Sometimes a loose wire or incorrect connection can throw off the entire circuit.
- If you’re still having issues, make sure your code is correct. A simple typo can cause major headaches in getting your sound sensor to work properly.
- Another common problem could be interference from other electronic devices. Try moving your setup away from potential sources of interference like Wi-Fi routers or microwaves.
- If you’re using an analog sound sensor, calibrating it correctly is crucial for accurate readings. Make sure you’ve adjusted the sensitivity according to your project’s requirements.
Creative Applications of Sound Sensor with Arduino
Sound sensors with Arduino have opened up a world of creative possibilities beyond just detecting sound levels.
- One innovative application is creating interactive art installations that respond to different sounds, transforming them into visual displays or kinetic movements.
- Another exciting use is in home automation systems where sound sensors can detect specific commands or patterns to control lights, appliances, or even trigger security measures. Picture walking into a room and having the lights adjust their brightness according to ambient noise levels. It adds both convenience and a touch of futuristic flair to everyday living spaces.
- Moreover, sound sensors with Arduino can be utilized in educational settings for science experiments or projects involving audio data collection and analysis. Students can explore concepts like acoustics, frequency modulation, and more through hands-on activities that make learning fun and interactive.